How to Create a Blog in Squarespace

Are you thinking about starting a blog on your Squarespace website? Maybe you just want to learn how to schedule your blog posts. Or you might not understand how to use all of the blog setting options.
You’re in the right place. I’ll show you how to add blog posts to your Squarespace website, schedule or publish them and explain all of those blog settings (categories or tags?) you’ve been wondering about.
Table of Contents
Why Add a Blog to Your Squarespace Website?
There are a lot of great reasons to start blogging.
A blog can help you answer your clients’ frequently asked questions
Blogs help you build trust with your clients, showing your expertise
You can repurpose your blog content to use on social media
Blogging helps your SEO – long term
How to Add a Blog to Your Squarespace Website
A lot of the templates will already include a blog. If that’s the case you can step this step and move on to customizing the blog page. If you’d prefer to delete it and start fresh, you can do that too. Adding a new blog to your Squarespace website is really easy.
From your home menu click Websites
Click on the plus symbol + next to Main Navigation or Not Linked
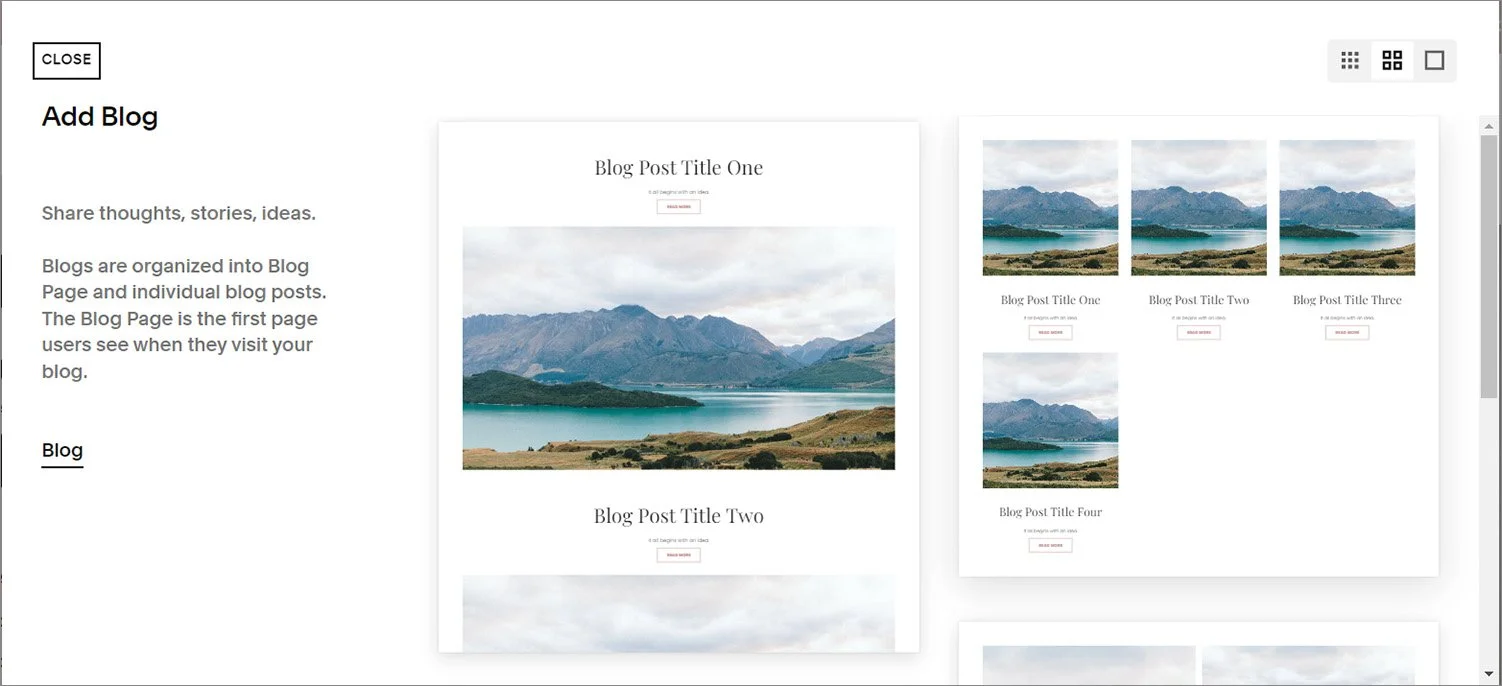
Choose Blog
From the images choose the layout you prefer (don’t worry you can change this later)
Enter the blog name (or leave it as blog)
Click Return or Enter
And done!
*Note about the Blog Name: I tend to leave the name as “blog” and I would recommend that you do too. That way your visitors understand what the page is. Also, since the blog name is included on the URL for the posts, it doesn’t make the page URL too much longer.
Blog post URLs will look something like this:
www.your-site.com/blog/page-name
**Remember to add an SEO title for your blog!
Customize the Style of Your Main Blog Page
Your main blog page shows images and titles from all of your blog posts. You can also show a “read more” link, an excerpt from your post and/or meta data (author, date or category). It shows 20 posts previews (max) per page.
The main blog page is very customizable in Squarespace 7.1. You can add fluid engine sections (with any fluid engine blocks) above and below the blog post previews. You also can change colours, fonts, spacing and the layout of your previews.
Add a New Section to Your Blog Page
This works like any other page in your Squarespace 7.1 fluid engine website. Simply click EDIT at the top of your page. Then hover around the area where you want the new section and click ADD SECTION. Now you can add new blocks.
Change the Post Preview Layout or Colours
Click Edit at the top of the main blog page
Hover over the post preview section
Click Edit Section
Now you have the choice to edit the Format (layout) or the Colors of this section

In the Format section you will first see your main layout choices for the previews: Grid, Masonry, One Column, Side by Side and Alternating Side by Side. Depending on the layout you’ve chosen you may see options underneath for number of columns and horizontal or vertical spacing.
Scrolling down further you will see options for your images, text alignment and your meta content. Finally, you have 4 icon/spacing options to separate your meta content.

In the Colors section you can pick the colour theme for your blog page. If you want to change the colours for that theme click on the pencil item. Make your changes in the site styles section and save.

Change the Font Styles on Your Blog Page
To change the font styles:
Click on the paintbrush icon in the top right corner
In the Site Styles Menu click on Fonts
Click Assign Styles
Find the blog styles and customize
Save
Create Your First Squarespace Blog Post
Now you’re ready to create your first post!
Just click on the plus sign “+” next to your blog name to get started. A new window will open where you’ll see a place to enter your post title (Enter a blog post title…) and a section to write your blog post (write here…).

Save your post to create a draft. You can keep saving until you are ready to publish or schedule your blog.
Customize Your Blog Post Style
You can customize the format of your blog posts with layout and meta content options (date, author & category). You can also change the colour and font styles for your blog posts.
*These changes will affect ALL blog posts.
Change the Layout or Colours of your blog posts
Click Edit at the top of the main blog page
Hover over the post preview section
Click Edit Section
Now you have the choice to edit the Format or the Colors of this section

Change the Font Styles of Your Blog Posts
To change the font styles:
Click on the paintbrush icon in the top right corner
In the Site Styles Menu click on Fonts
Click Assign Styles
Find the blog styles and customize
Save
Edit the Squarespace Blog Post Settings
Okay, the blog post is almost ready to go! Before this gets published we just need to adjust some of the settings for our blog post. These settings will apply only to this particular blog post, so you’ll need to do this for every post.
First let’s open up the post settings:
Hover over the blog post name in the menu
Click on the three dots that appear next to the name •••
Click on Settings
Now you’ll have the Squarespace Blog Post Settings with 6 different sections: Content, Options, SEO, Social Image, Share and Location.
Content

Featured Image:
This is the preview image that shows on your main blog page. If you use a summary block it will also show there.
Excerpt:
Add a few lines from your post or add a short description here. This will show on your main blog page if your excerpts are turned on. You’ll also see this description if you link to your blog from social media.
Post URL:
Squarespace will automatically create a URL for you from your title. Generally you are going to want to change this to take out all the filler words (such as to, and, the). Try for 4-6 words separated with a hyphen.
Author:
If there is only one user on your website you won’t have to do anything here. It will simply show your name. If you have multiple users, Squarespace sets this to the user who starts the post, so you may have to choose the right author from the dropdown list.
Source URL:
This creates a link to another page, for instance if you’ve written a guest post somewhere. I’m not sure how this would affect SEO as Google doesn’t like duplicate content. I’ve never used added anything here.
Duplicate:
Make a copy of the blog post. This is handy if you are creating a template for your blog.
Delete
Options
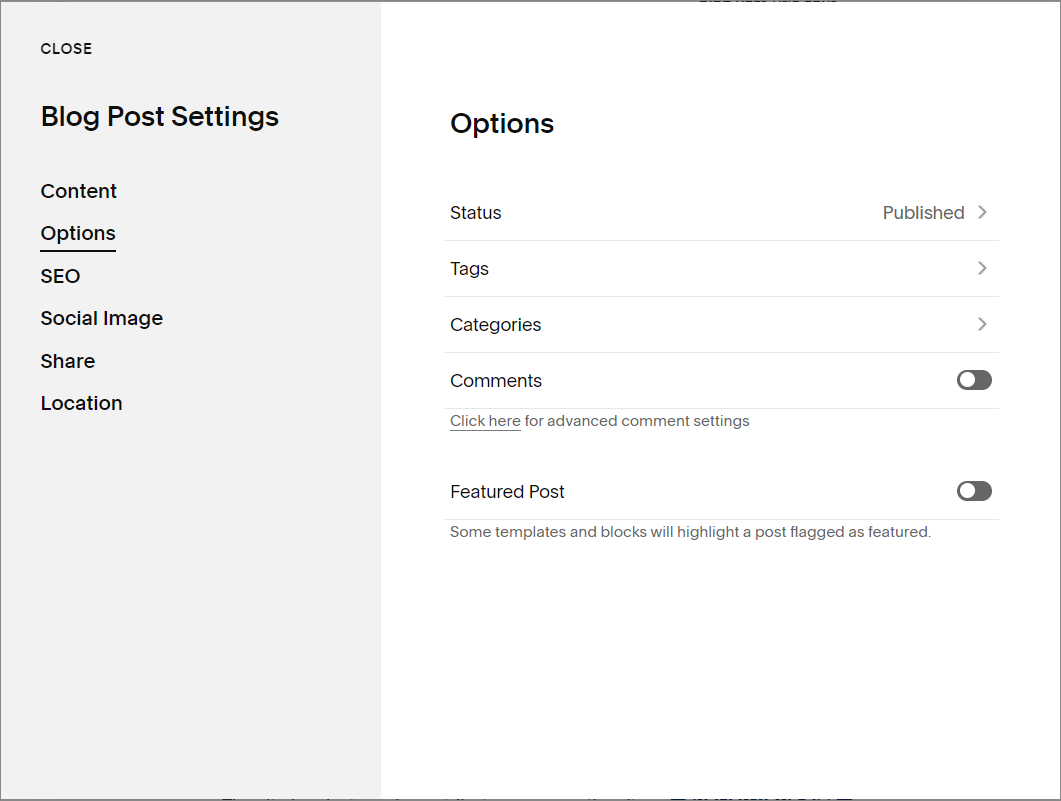
Status:
Have you published your blog by mistake and want to move it back to a draft? You can do that by clicking on the arrow and choosing the Draft option. You can also publish or schedule your blog here. Or, if you work with a group, you can set the status to Needs Review.
Tags & Categories:
These are both ways to organize your posts to help users find the content they want more easily. Tags are more specific. You can think of them like keywords from your blog. Categories are more general groupings of your blogs.
You can link to both categories and tags, and use them to filter content in summary and archive blocks.
* Squarespace creates individual pages for all of your categories and tags. These pages have little content and can show up as duplicate content. So while they are great for users, it’s a good idea to exclude them from being indexed by the search engines.
To do this go to your blog menu and click the cog next to the blog collection name. Click SEO then scroll down to find “Hide from Search results”. Toggle the All Categories and All Tags in this collection to the on position.
Comments:
Turn comments on or off for this blog post.
Featured Post:
Use this to filter posts in your summary blocks. This is a good way to create a “popular posts” section.
SEO

SEO Title & SEO Description:
Use this section to create titles and descriptions of your post that are search engine optimized. If you don’t add a title, your blog title will be used.
There is a preview of how your page will appear in search engine results at the top of the page. If you haven’t added an SEO description you won’t see a preview here. Search engines will use some part of the blog content.
Related post:
What’s the difference between the Squarespace Page Title, Navigation Title and SEO Title
Social Image
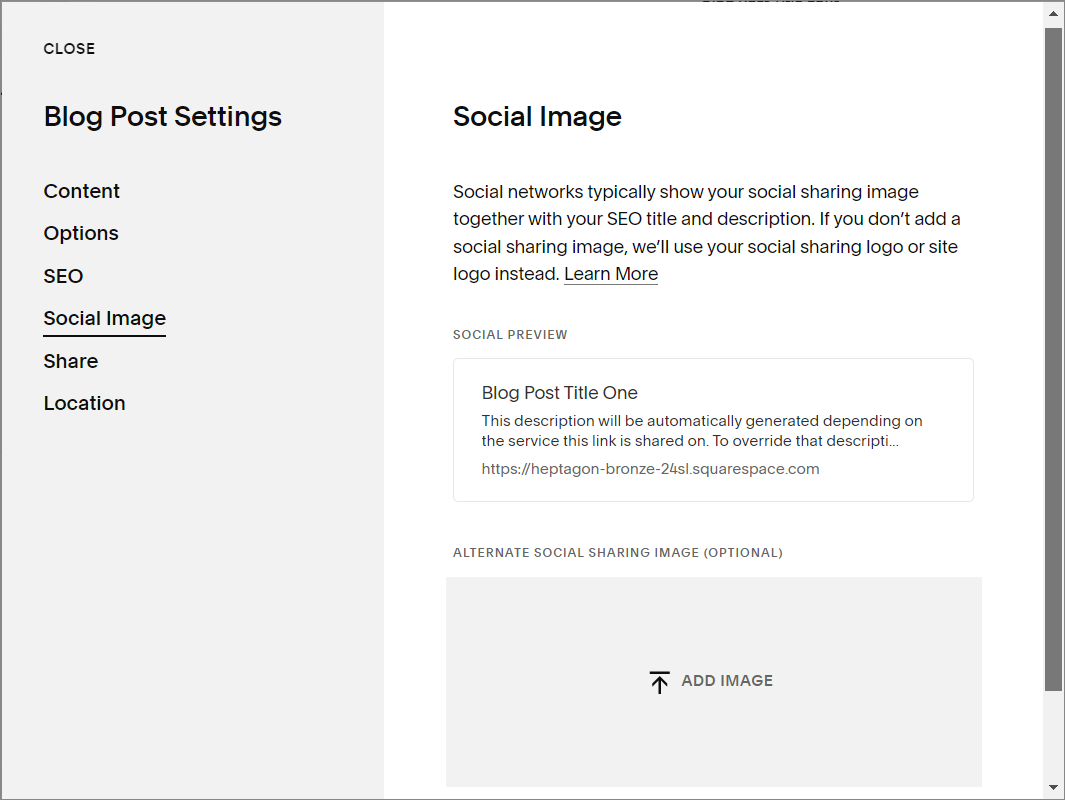
Alternate Social Sharing Image:
This section lets you add an image that will be shown on social media when you share your blog post link. If you don’t add an image here, your featured image, main social sharing image or your website logo will be used by the social media site.
Share

Create Email Draft:
Clicking on this link will create a draft of your blog post that you can send out to your mailing list through Squarespace Email Campaigns. I prefer to use a preview of blog posts rather than the entire post. I think it’s better to entice people to come to your website.
Connect Account:
You can connect your social media accounts here to push your link to them when your blog post is published. I like to schedule my posts, so I use Facebook Business Manager and Tailwind instead.
Location

If you have a physical location for your business you can add the address here. It won’t show up on your blog (main page or post) in Squarespace 7.1 but you can use it with a summary block. Your business name will show, linked to Google Maps.
Publish or Schedule Your Blog Post
Yes, we’re finally ready to get this post up! There are two ways to publish or schedule your Squarespace Blog Post.
Publish through the Blog Settings
We’ve already touched on this a little in the overview of the Blog Settings. You can publish from the Status area after you’ve adjusted your other settings.
Hover over the blog post name in the menu
Click on the three dots that appear next to the name •••
Click on Settings
Choose Options > Status
Choose the Status for your post (Draft, Needs Review, Publish, Scheduled)
Save
If you choose Scheduled, you will need to pick a date and time before saving.
Publish from the Blog Post
I like to take a last little look through my blog post just before I schedule or publish my post, so this is usually the way I go about publishing.
While your post is in edit mode click on the Publish button in the top left hand corner
Choose Publish or Schedule

If you choose Schedule you will need to pick a date and time, then click Schedule at the top of the pop-up.
Congrats! Your post is now out on the web. Now, what’s your next blog going to be?