How to Organize Your Website Images with the Squarespace Asset Library

How many images or videos do you have on your website?
If you blog or a portfolio on your website you might have hundreds or maybe even thousands.
So, how do you keep all those files organized? By using the Squarespace Asset Library. With this little tool you can upload your images and separate them into folders making them easy to use and reuse.
How to access the Squarespace Asset Library
Getting to the Asset Library is easy! Simply click Asset in the home menu (right under websites).
How to add images to your Asset Library
You can add images or video to the Asset Library in 3 different ways.
In the Asset Library:
One, you can drag and drop images into the library from your computer.
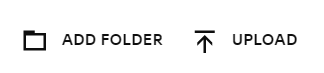
Or, you can click Upload in the top right corner of your Asset Library. Then choose one or several images to upload. You can see the progress of your upload in the bottom right corner. A green checkmark will appear when all of your selected files are uploaded. It will also tell you how many images you uploaded.
From your website editor:
You will also have the option to upload files using image blocks, video blocks, gallery blocks or sections, product blocks, background images and more.
Once you upload images or video to these blocks they will be available in your Asset Library to reuse throughout your website.
How to reuse images from the Library on your website
You can add images from your Squarespace Asset Library to many blocks on your website including image blocks and galleries. Depending on the block you can choose Select from Library or Search Images. Search images will then give you the option to choose your Library or stock images (either free or paid).
How to Delete Images from the Asset Library
If you’ve added a duplicate of an image or added the wrong image, you may want to delete that image from your library.
In your Asset Library click the white box in the corner of the image, video or folder you want to delete
Click on the trash can icon in the box that appears
Click Delete to confirm
Deleted images and videos are sent to the trash folder. They are permanently deleted in 30 days. Before the 30 days it is possible to restore your images to your library. Click the box next to the file. Then click the restore icon (two arrows in a circle) to restore.
*If you delete an image that exists on your website the space will now be blank, so make sure to check your site for missing images.
How to organize your images with folders
It can be almost impossible to find what you are looking for in a big pile of stuff – including a big pile of images. To make it easier to find the right image you can arrange your image into folders and subfolders.
To create a folder in the Asset Library
Click Add Folder in the top right of the library
Write your folder name in the box
Click Create
To create a subfolder
Click on the folder in the library menu or double click the folder on the library page
Click Add Folder in the top right of the library or Create Folder on the page
Write your folder name in the box
Click Create
You can create up to 300 subfolders in each folder and have 40 levels of subfolders.
Move images into folder
You can move images from folder to folder or from the main asset library page.
Hover over the image you want to move
Click on the three dots ••• in the top right corner of the image
Choose Move To
Choose a folder or subfolder, then click Move Here

How to rename images in the Asset Library
Since search engines can’t actually see your images, it’s important to give your images descriptive names. That way Google and other search engines will not only understand your image better, but also the content of your page. This can help your SEO.
So what if you uploaded an image without renaming it? Now you can rename it in the Asset Library.
Simply double click on the name. Write your new name in the field and click off the field to save.
Or you can click on the three dots on your selected image. Choose Rename. Write your new name and click Save.
Related Post: Optimizing Your Images to Improve Your SEO
Check your image details
Another important detail to know for your image SEO is your file size. Squarespace recommends that your images are less than 500kb. To see the size, your image dimensions and the date the image was added you’ll want to see the File Details.
In the Asset Library hover over the image you want to check
Click on the three dots ••• in the top right corner
Click File Details
While you are in the File Details you can also download your image by right clicking on the image and saving it to your device. It’s a good idea to keep a copy of all of your image files.