How to Add & Style Squarespace Forms

Contact forms. Surveys. Registration forms. Customer feedback forms. Opt in forms.
These are just some of the types of forms we use on our websites.
Just think about how many online forms you’ve filled in this week. I’ve already filled in one today!
Most of us have at least one form on our websites. Squarespace forms are easy to add, but up until recently they’ve been really boring - just plain grey boxes. You couldn’t add your own colours or change the style much.
But that’s all changed for Squarespace 7.1 websites. Squarespace just added a ton of new styling options to their forms!
Table of Contents
How to Add a Squarespace Form

Adding a form in Squarespace 7.1 is as easy as adding a text box or image.
Click EDIT in the top left corner of the page you want the form
Hover over the section you want the form and click + Add Block
Choose Form from the list and drag the form into place
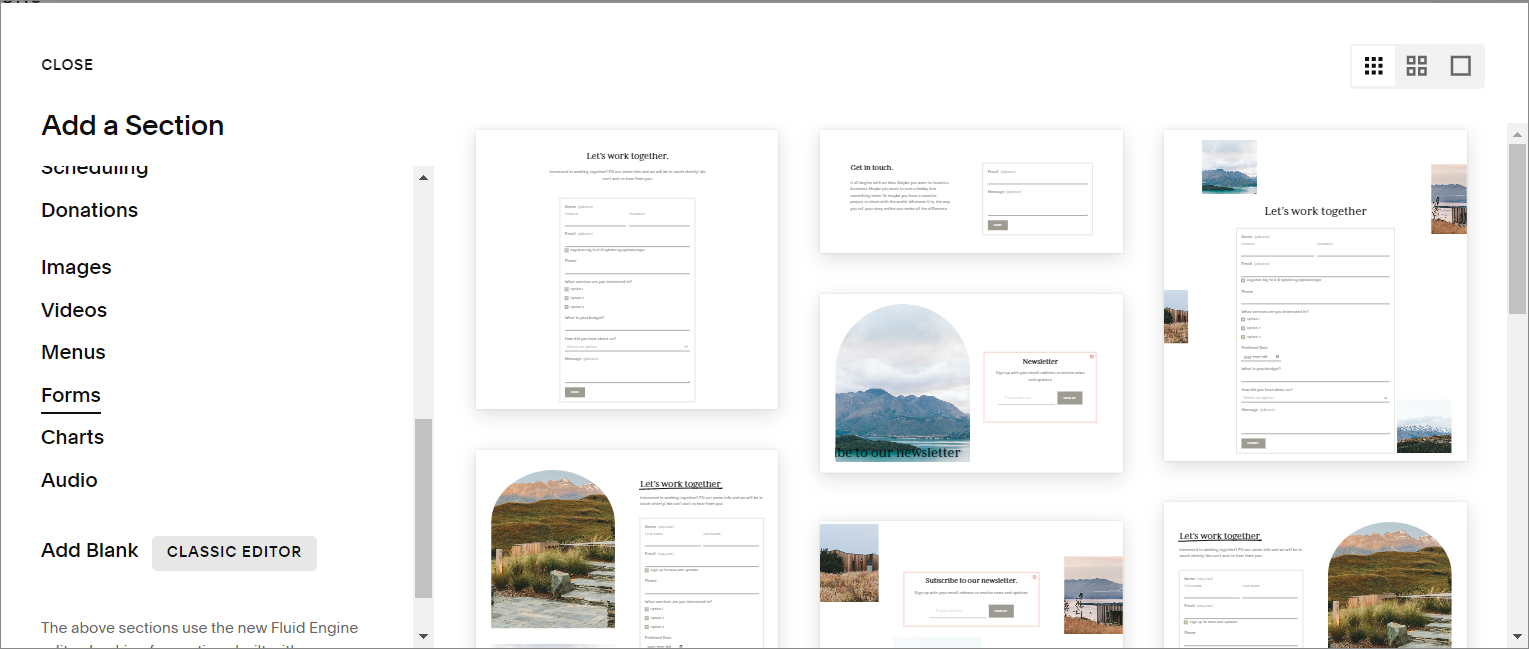
Alternatively, you can add a new section layout that has a form.
Click EDIT in the top left corner of the page you want the form
Hover over the page and click Add Section where you want the new section
Click on a layout to select
Add Content to Your Form
Now it’s time to add (or remove) some form fields, so that your form has the fields you want and need. You’ll also want to add a name to your form, so that you know which form on your site has been used when you get an email. This can also help you to identify spam or phishing emails that look like they’ve been sent from your website.
You can also change text on your submission button and decide what happens after the form has been submitted.
Add Form Fields
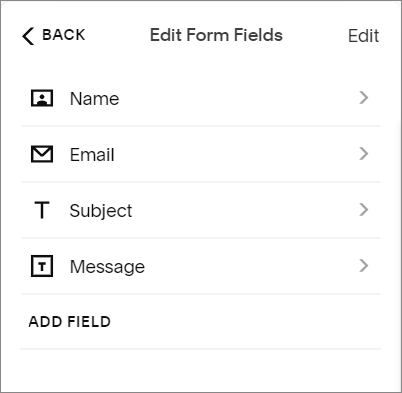
Click onto your form then click the pencil icon to edit
In the Content Tab click Edit Form Fields
Click Add Field, then choose your field from the list
To edit the form field (ex: change the label name, add a description, delete) click on the field name or arrow next to the name
Click out of the form to finish
While in the Content tab you can change the Form Name and Button Text.
To Remove Form Fields or Change the Order of the Fields
Click onto your form then click the pencil icon to edit
In the Content Tab click Edit Form Fields
In the top right hand corner click Edit
Click the red circle to remove a field or drag a field to a new location
Click Done
Click out of the form to finish
Add Follow-up Questions to Your Form
As of February 2025 you can now add follow-up questions to your form. This new feature is available for any multiple choice form field type such as a dropdown, checkbox, radio or survey field.
To add follow up question:
Add your form field and options
Click the three dots ••• next to the option that you want to follow up
Choose add a follow up question
Select your new field and add your question
Click out of the form to finish
You can even add a follow-up question to your follow up!

Add Storage for the Form
Your form is set up to email results to the owner of the website (the one on your Squarespace account). If you want to change the email address or add secondary storage you’ll need to use the storage tab of your form editor.
Click onto your form then click the pencil icon to edit
Click on the Storage tab
Click on the email address to enter a new address
Click on Additional Storage to connect your form to Google Drive, Zapier or MailChimp
Click out of form to finish
How to Style Squarespace Forms
Unless you have already changed the styles another form on your website, your new form will look like the same old boring grey boxes. You can style your forms from the Form Editor and/or in Site Styles. I would recommend starting in the Form Editor and then moving to Site Styles if you want more detailed options.
*Changes to your form styles will affect all forms on your website.
Style Squarespace Forms with the Form Editor
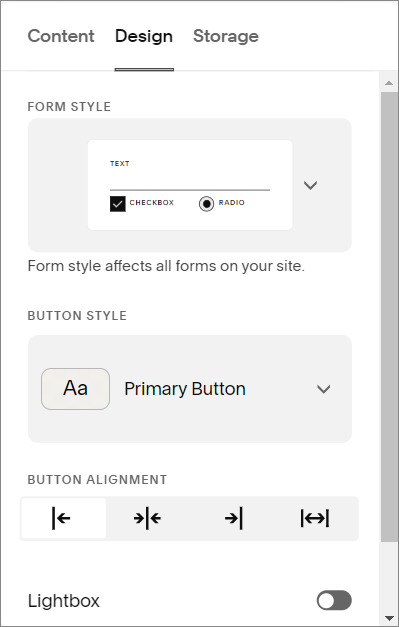
The form editor allows you to make some quick style changes. You can choose one of Squarespace’s form styles or form packs and change the button style and alignment. You can also choose to add a background for your form and to turn your form into a lightbox.
Click EDIT in the top left corner of the page that your form is located
Click onto your form then click the pencil icon to open the Form Editor
Click on the Design tab
Choose a Form Style or Button Style from the dropdowns and/or switch the toggle to the on position for the Background or Lightbox feature.
Click Save in the top left corner of your page
Style Squarespace Forms with Site Styles
Through Site Styles you can make much more detailed changes to your form style, such as the fonts, colours and spacing of your form. You can also change the form pack or main form style.
You can’t change the button styles for your form, add a background or turn your form into a lightbox in Site Styles. You will need to make those changes through the Form Editor (above).
To access your form Site Styles
Click on the paintbrush icon in the top right corner to access Site Styles
Click Forms

You will now see your main style option to change your Form Pack, your Field Shape (ex: pill, square), Field Fill (whether your form fields are filled or blank), Border style, Border Thickness and Padding (how big the space is inside the field).
Below the main options you’ll see 4 further styling submenus.
Field Options: This menu allows you to make changes to the checkbox, radio and survey fields, including things like the field style (you can change checkboxes and radio fields into buttons), field fill and layout.
Fonts: This menu lets you specify the fonts for all the fonts in your form.
Form Spacing: Does the spacing seem a little tight on your form? Use this menu to change the spacing between fields, labels and descriptions.
Colors: This will probably be the menu that you use most. Instead of the default form colours you can choose to use your theme colours by switching the toggle to the on position. You can also change individual colours for things like your background, button, field border and fonts.
I’m so happy that Squarespace has now made their forms as gorgeous as their websites. You now have the tools to make yours beautiful too.
I can’t wait to see what you make!